Requirements[]
- Ravage 0.1.37 mod installed (the Tanoa mission is not included with earlier versions of Ravage)
- CBA addons installed
- ArmA 3 Apex DLC owned and installed
If you do not own the Apex DLC, you cannot play the Tanoa mission. Tanoa is a landscape that is included with the Apex DLC, so you must own it in order to be able to play on it. If you don't have it, the mission will not load.
Installation[]
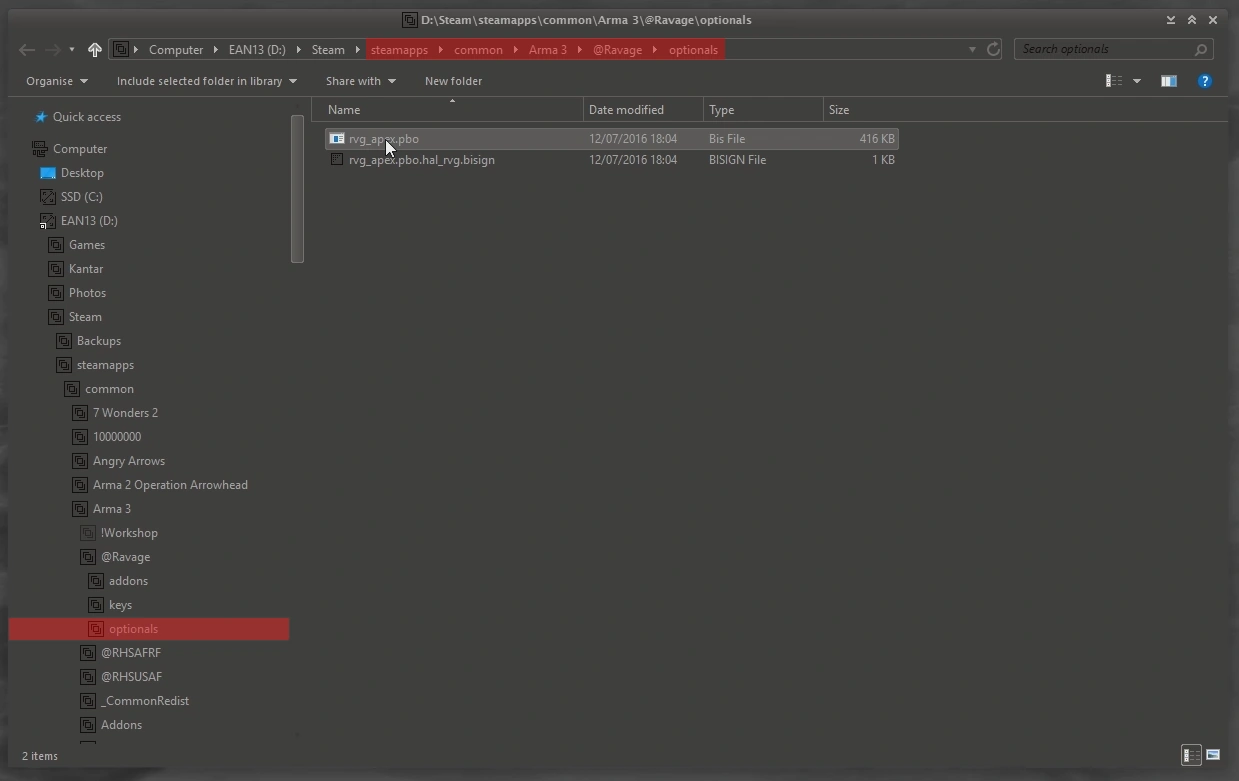
With Ravage 0.1.37 installed, you'll find the @Ravage folder (inside your ArmA 3 folder) contains a sub-folder named optionals. Inside that folder are two files. We're only interested in one of them: rvg_apex.pbo
Check the screenshot to see the file in the optionals folder. Ignore the other file in there - it's nothing to do with the Tanoa mission. The rvg_apex.pbo file just needs to be moved (or copied) to another folder.
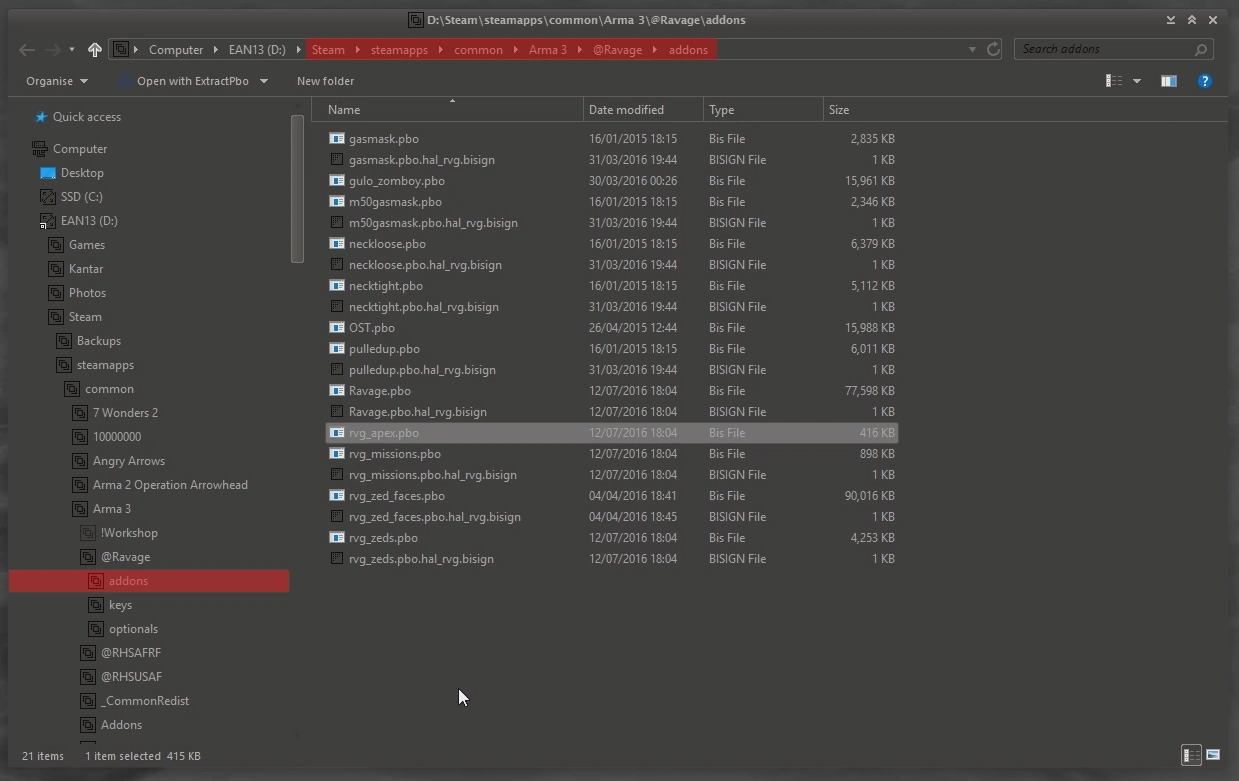
Also under the @Ravage folder is one called addons. With ArmA mods, only the files in the addons folder are loaded. Take rvg_apex.pbo and place it in the addons folder. Do not put it in Missions or MPMissions like you would normally do with mission files. It must be in the addons folder or it will not work.
This is all you need to do. Now start ArmA 3 with Ravage and CBA loaded as usual.

Once in the ArmA 3 main menu, go to Single Player > Scenarios as usual. Click on the drop down arrow next to Ravage and you'll find there is a new entry marked Tanoa. Click it and start a new mission. That's all there is to it. You can continue to play the Altis mission without having to alter anything.
Gameplay[]
You start the Tanoa mission as an unarmed prisoner. You need to escape and there is no easy way to get a firearm. Once you move beyond a certain starting area, you will receive a message to say that you have been spotted. Hostile forces are then able to fire upon you.
Most of the features of the Altis mission are present in the Tanoa one, but there are also one or two new features that you will discover as you explore. The Quick Save feature is not present, so you will have to save through the main menu. Different levels of difficulty affect how often you are able to save. Play on the Recruit setting to ensure you can save as often as you wish.